A common WordPress error is the HTTP ERROR 500. This can be caused for many different reasons. If it’s being caused due to not being able to handle the request then chances are you’ll need to increase the PHP memory limit for your WordPress site.
Table of Contents
When the WordPress currently unable to handle this request. This page isn’t working HTTP ERROR 500. error displays in the browser there might be other issues causing that error to display such as bad .htaccess rules or even a plugin or theme causing the issue. In this article you’ll learn how to increase the PHP memory limit in the MultiPHP INI Editor in cPanel, wp-config.php or php.ini.
This error message could be a sign that the server’s limits are set too low, that the server your website is hosted on might be overloaded with too many customers sharing (and abusing) server resources, or that a poorly coded theme or plugin may be exhausting memory limits.
WordPress HTTP ERROR 500 – is currently unable to handle this request.
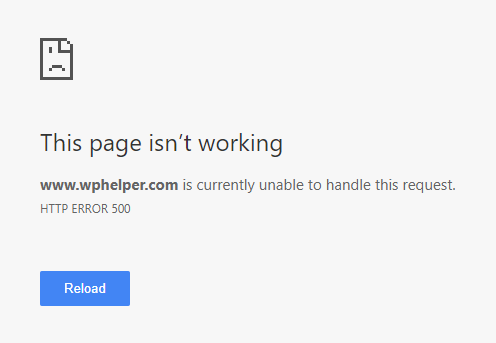
Here’s what the error message might look like in your browser:
domain.com is currently unable to handle this request. This page isn't working HTTP ERROR 500.
If you check the local WordPress log file “error_log”, located inside of the public_html or document root, you may notice similar log entries below:
[25-Apr-2019 015:23:12 UTC] PHP Fatal error: Allowed memory size of 41943040 bytes exhausted (tried to allocate 32768 bytes) in /home/wphelper/public_html/wp-admin/includes/post.php on line 530
[11-Jul-2019 04:16:50 UTC] PHP Fatal error: Allowed memory size of 41943040 bytes exhausted (tried to allocate 65536 bytes) in /home/wphelper/public_html/wp-content/plugins/ark-core/builder/elements/Header/class.ffElHeader.php on line 3385
The first example of an error_log entry shows us that the issue is related to memory. In the second example we can see that the memory limit is being hit from a plugin “ark-core” that’s installed on the website.
What Causes the HTTP ERROR 500?
The above examples of a PHP Fatal Error related to memory is typically because the allowed memory was exhausted. Most shared server environments will have conservative default PHP memory settings that can be easily hit if you’re website is using plugins known to be resource intensive. This is to prevent abuse from other customers on the same shared server environment.
Four Ways to Increase PHP Memory Limit
If you have a VPS or Dedicated server with WHM access or root access DO NOT set your server’s PHP memory limit to a value of -1 (unlimited). This may cause performance issues down the road. In this article we’re going to show you how to increase the PHP memory limit inside of cPanel’s MultiPHP INI Editor, the WordPress wp-config.php, .htaccess, and php.ini.
1. Use the MultiPHP INI Editor in cPanel to Increase PHP memory_limit
Do you have access to cPanel? Many WordPress web hosting providers use cPanel, a widely used control panel for Linux server environments. You can increase the PHP memory_limit inside of cPanel by accessing the MultiPHP INI Editor. In some cases your web hosting provider may have the MultiPHP INI Editor disabled in cPanel. If the MultiPHP INI Editor is disabled in cPanel you’ll need to try one of the other methods below.
Log into cPanel and locate the MultiPHP INI Editor icon. Select your domain name from the drop down menu as shown in the picture below.
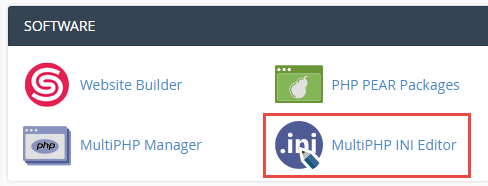

After you’ve selected your domain name you’ll see a list of PHP Directives listed underneath the drop down menu. Locate the memory_limit row. In the first picture you’ll see that the “memory_limit” value is set to 128M and we’ve updated that to 256M.


Make sure to use M in your value. This denotes “megabytes”. After increasing the memory_limit value make sure to click the Apply button at the bottom of the page to save your changes.
2. Edit the wp-config.php to Increase PHP memory_limit
For anyone on a shared or managed WordPress hosting plan you should be able to access your wp-config.php file. Common ways to access the wp-config.php:
- File Manager in cPanel
- File Transfer Protocol (FTP)
- File Manager Plugin
In this example, we’re going to use cPanel’s File Manager to edit the wp-config.php file. Locate the File Manager icon in cPanel. Clicking this will open a new browser tab and take you into the File Manager.
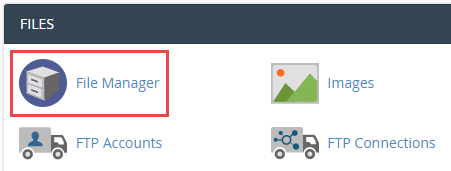
Make sure you’re in the “public_html” if this is for your primary domain. If you need to edit the wp-config.php for an “addon” domain or “subdomain” you’ll want to make sure you are in the right directory (document root) for that domain.
The wp-config.php is a core WordPress file. Select the file in File Manager and click Edit.
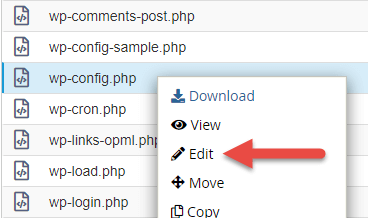
Once you’ve opened the wp-config.php scroll down in the file and locate the “/* That’s all, stop editing! Happy blogging. */” section of your wp-config.php. Place the following code above that line.
/** Increases PHP Memory Limit */
define('WP_MEMORY_LIMIT', '256M');
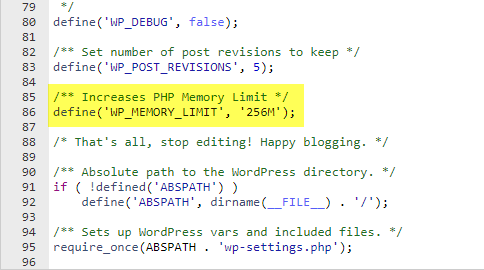
If issues still occur when you attempt to access your WordPress site you’ll need to try increasing the value from 256M to 512M or 1024M.
3. Edit the .htaccess to Increase PHP memory_limit
The .htaccess (Hypertext Access) is a hidden dotfile that is used on Apache web servers to configure options or functionality on a per directory basis without having to edit the server’s configuration files. You can access this file in the “public_html” or document root. In this example, we’re going to edit the .htaccess file using the File Manager inside of cPanel. If you are able to connect to your account using FTP you’ll be able to download the .htaccess file locally to your computer, edit the file, and re-upload the new .htaccess back into the same location.
To increase the PHP memory_limit by using the .htaccess log into cPanel and locate the File Manager icon. This will open a new browser tab and take you into the File Manager. Navigate into the “public_html” or document root of your domain.

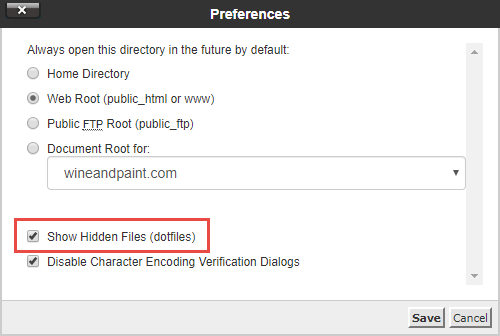
Inside of the “public_html” or document root for your domain you should see a file with name .htaccess. If you do not see this file you will need to turn on the setting to show hidden dotfiles. To show hidden dotfiles click the Settings button located at the top right of the page, check the box for Show Hidden Files (dotfiles) and click the Save button.
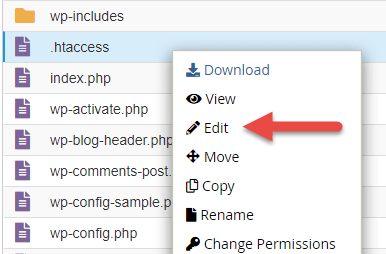
You should now see the .htaccess file. Select the file and click Edit.
Place the following code at the bottom of the .htaccess file and click the Save Changes button.
# Update PHP Memory Limit
php_value memory_limit 256M
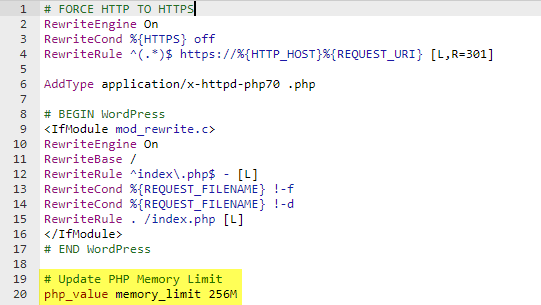
You can increase the PHP memory_limit value from 256M. Just make sure to include the ‘M‘ after the value to denote “megabytes”.
4. Edit the PHP.ini to Increase PHP memory_limit
Similar to editing the .htaccess file, you can create (if it doesn’t exist) or edit your account’s php.ini. Log into cPanel to access the File Manager. The php.ini will reside in your “public_html” or domain’s document root.
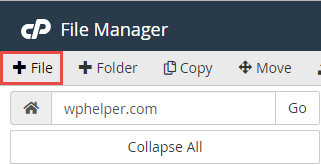
If you don’t see an existing php.ini file you’ll need to create one. Click the + File to create the php.ini.
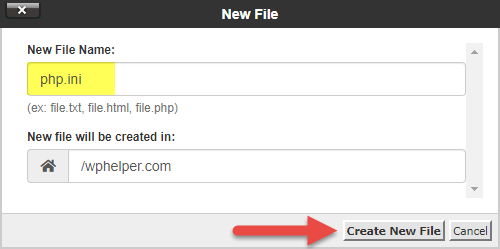
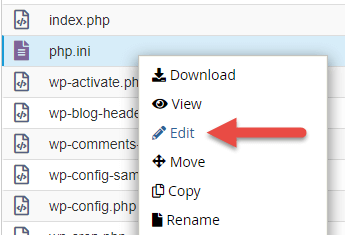
Select the newly created php.ini file, click Edit and place the following code into the file. Click the Save Changes button after you’ve placed the code into the file.
memory_limit = 256M
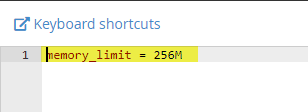
You can increase the PHP memory_limit value from 256M. Just make sure to include the ‘M‘ after the value to denote “megabytes”.
If you’ve tried every option outlined above you may need to contact your web hosting provider to get them involved in making the change for you.
