

Many web hosting providers disable the PHP mail() function on servers. It might be frustrating at first with site notifications such as password resets, user registrations, comments, contact form notifications, etc. not being sent, but it’s for good reason–security measures.
Table of Contents
The PHP mail() function is disabled on many shared hosting environments to prevent a “hacked” WordPress site from sending out uncontrollable amounts of spam from the server or WordPress site, which could result in a server’s IPs getting blacklisted or even worse, causing the server’s hostname or entire IP range blacklisted. This would cause an interruption in email services for all of the other customers using the shared server for email. It takes one bad apple to cause a huge problem for the web host.
This is why many web hosts require SMTP Authentication (SMTP AUTH) if you want your site’s notifications and contact forms to work properly. It’s in the best interest for you and the web host’s customers on shared web hosting environments. You can easily setup SMTP Authentication on WordPress by using a SMTP AUTH plugin. We recommend using either of the two WordPress SMTP Authentication plugins down below and will walk you through the configuration process of each recommend SMTP plugin.
What is SMTP Authentication?
SMTP AUTH is an extension of the Simple Mail Transfer Protocol (SMTP) that provides an access control mechanism for submission servers. What happens when SMTP AUTH is configured? It requires clients to use the SMTP AUTH extension to log into the mail server to first authenticate with when mail is being sent. This helps prevent compromised accounts or websites from sending unauthorized spam while legitimate, authorized users are able to send mail.
The submission server will log mail data to determine who used and send mail through the server. The receiving server is able to indicate that the sender has been authenticated prior to the mail being sent to that server.
SMTP Authentication Plugins
WordPress is a widely used Content Management System (CMS). Anyone who uses WordPress is subject to multiple attacks in a day. You may not be aware of these attacks, but your web host should have many safeguards in place to protect your WordPress site from common attacks.
The Achilles heel of WordPress is the use of third-party themes and plugins. Third-party themes and plugins may have vulnerabilities and are perfect attack vectors for “hackers” looking to gain access to your WordPress site for malicious use (e.g., creating backdoors, defacing your site, and sending spam).
There’s many WordPress SMTP AUTH plugins in the WordPress marketplace. Here are two that we recommend:
Configure WP Mail SMTP WordPress Plugin
The WP Mail SMTP by WPForms plugin is one of the most downloaded SMTP plugins in the WordPress marketplace with over 1+ million active installations at the time of this writing. After the WP Mail SMTP plugin is installed it’s very easy to configure.
You can download the plugin, upload the package via File Manager and extract the files or upload the plugin files via FTP. Alternatively, you download and activate the plugin directly inside of the WordPress dashboard. In this example, we’re going to install, activate and configure the plugin directly through the WordPress dashboard.
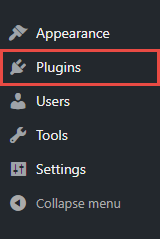
Log into the WordPress dashboard and navigate to the Plugins section.
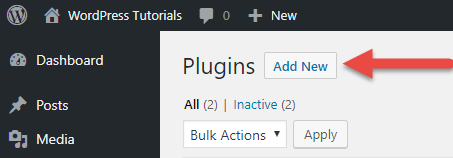
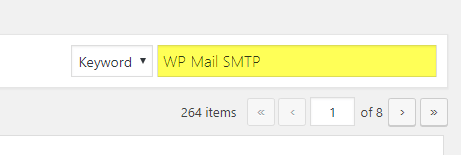
Click the Add New button at the top of the Plugins page. Search for “WP Mail SMTP in the search box located in the upper right corner of the page.
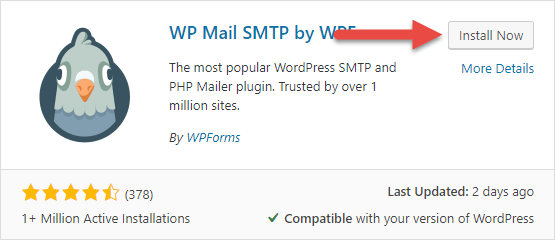
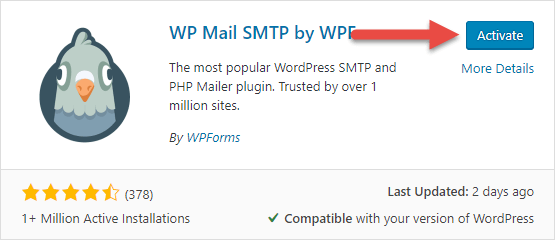
Click the Install Now button for the WP Mail SMTP by WPForms plugin. After the plugin installs click the blue Activate button to activate the SMTP plugin on your WordPress site.
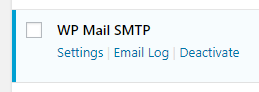
The plugin is now activated and will appear on the Plugins page. Click the Settings link to configure the WP Mail SMTP plugin. You can also access the plugin settings in the left navigation bar.
You’ll need to have an email account created on the server your site is hosted on to authenticate with. We’ll assume you already have an email account created. You can also use a G Suite email account if your email is through G Suite with Google’s SMTP server as your host.
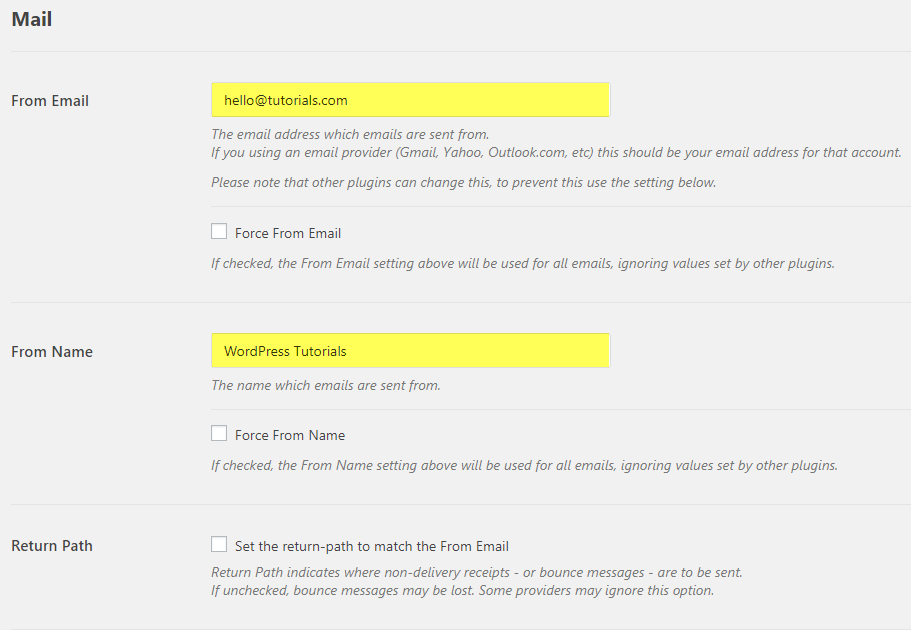
On the settings page you’ll need to enter the following details:
- From Email
- From Name
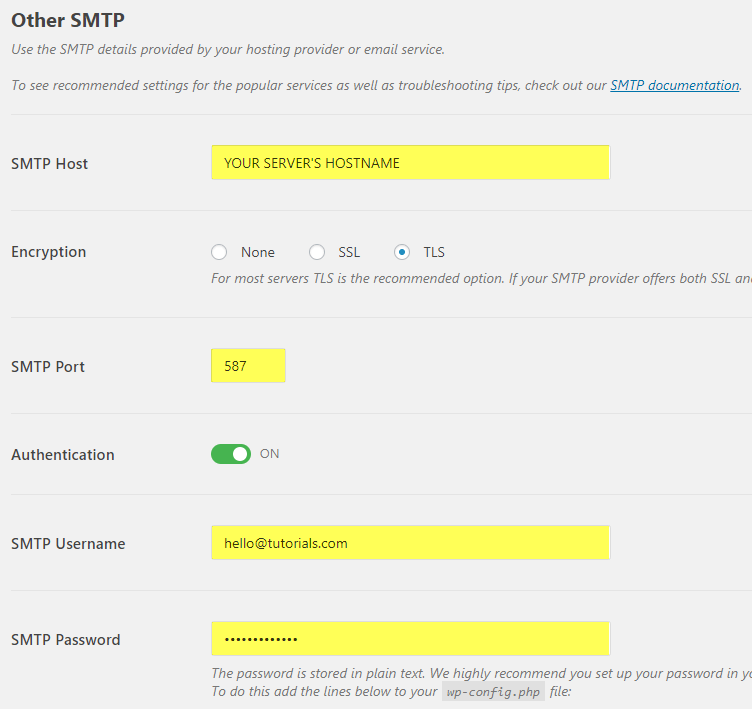
- Select “Other SMTP”
- SMTP Host
- Encryption
- SMTP Port
- SMTP Username (your email account)
- SMTP Password (your email account’s password)
The From Email needs to be the email account you’re going to authenticate with. Anything else in this field box will cause emails from your site appear to be “spoofed” (not good). In our example, we’re using [email protected], which will also be our SMTP Username.
Select the option for Other SMTP. Doing so will expand Other SMTP settings that need to configured.

The SMTP Host can be your server’s hostname, mail.yourdomain.com or Google’s SMTP server if you’re using G Suite. If you’re not using G Suite we recommend using your server’s hostname. If you do not know your server’s hostname you’ll need to contact your web hosting provider for that information.
The Encryption can be set to “None” if you’re going to use port 25 or 26, which is completely fine for SMTP Authentication purposes. We’re going to set ours to “TLS” on port 587.
The SMTP Username will be the email account you’re authenticating with and the SMTP Password is that email account’s password.
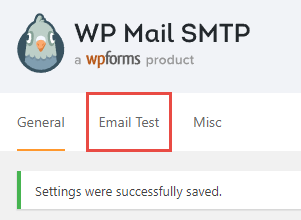
Click the Save Settings button to save the WP Mail SMTP settings. At the top of the page you’ll see a message “Settings were successfully saved”.
Now you’ll want to send a test email from your WordPress site to test and see if your SMTP Authentication is working properly. Click the Email Test tab. You can send the test email to any email address you’d like. After inputting an email address for the test email to be sent to click the Send Email button.

If you configured everything correctly you’ll see a green success message at the top of the page.

Now you can test your site notifications and contact forms to make sure email notifications from your WordPress site are sent and reach your inbox.
Configure Easy WP SMTP WordPress Plugin
The Easy WP SMTP by wpecommerce and alexanderfoxc plugin is a popular WordPress SMTP in the WordPress marketplace with over 400,000+ active installations at the time of this writing. After the Easy WP SMTP plugin is installed it’s very easy to configure.
You can download the plugin, upload the package via File Manager and extract the files or upload the plugin files via FTP. Alternatively, you download and activate the plugin directly inside of the WordPress dashboard. In this example, we’re going to install, activate and configure the plugin directly through the WordPress dashboard.
Log into the WordPress dashboard and navigate to the Plugins section.
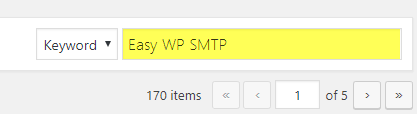
Click the Add New button at the top of the Plugins page. Search for “Easy WP SMTP” in the search box located in the upper right corner of the page.
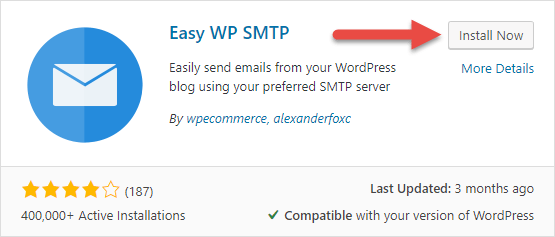
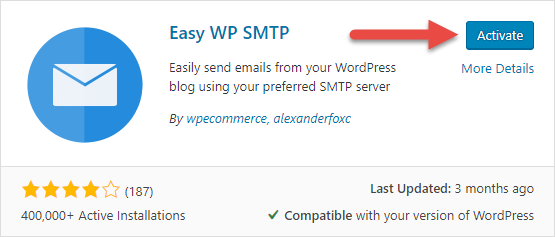
Click the Install Now button for the Easy WP SMTP plugin. After the plugin installs click the blue Activate button to activate the SMTP plugin on your WordPress site.
The plugin is now activated and will appear on the Plugins page. Click the Settings link to configure the Easy WP SMTP plugin. You can also access the plugin settings in the left navigation bar.

On the settings page you’ll need to enter the following details:
- From Email Address
- From Name
- Reply-To Email Address
- SMTP Host
- Type of Encryption
- SMTP Port
- SMTP Authentication (Yes)
- SMTP Username (your email account)
- SMTP Password (your email account’s password)
The From Email needs to be the email account you’re going to authenticate with. Anything else in this field box will cause emails from your site appear to be “spoofed” (not good). In our example, we’re using [email protected], which will also be our SMTP Username.
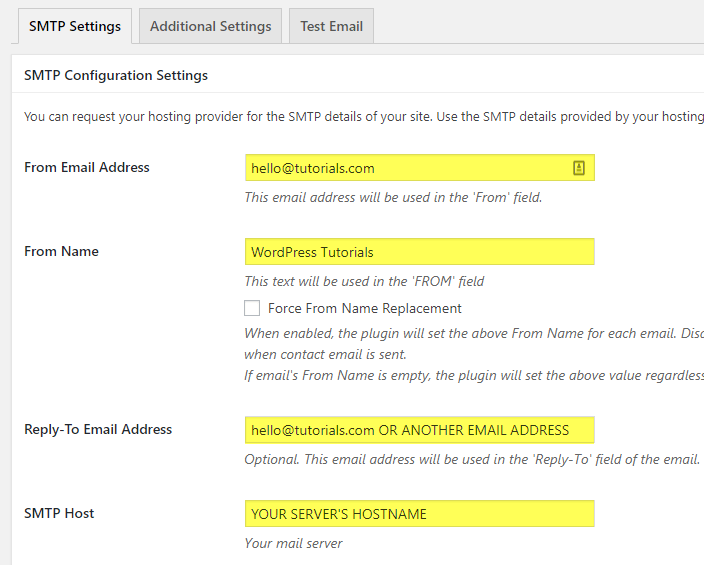
The Reply-To Email Address can be left blank, be your SMTP username or another email address you wish to receive replies to.
The SMTP Host can be your server’s hostname, mail.yourdomain.com or Google’s SMTP server if you’re using G Suite. If you’re not using G Suite we recommend using your server’s hostname. If you do not know your server’s hostname you’ll need to contact your web hosting provider for that information.
The Encryption can be set to “None” if you’re going to use port 25 or 26, which is completely fine for SMTP Authentication purposes. We’re going to set ours to “TLS” on port 587.
The SMTP Username will be the email account you’re authenticating with and the SMTP Password is that email account’s password.
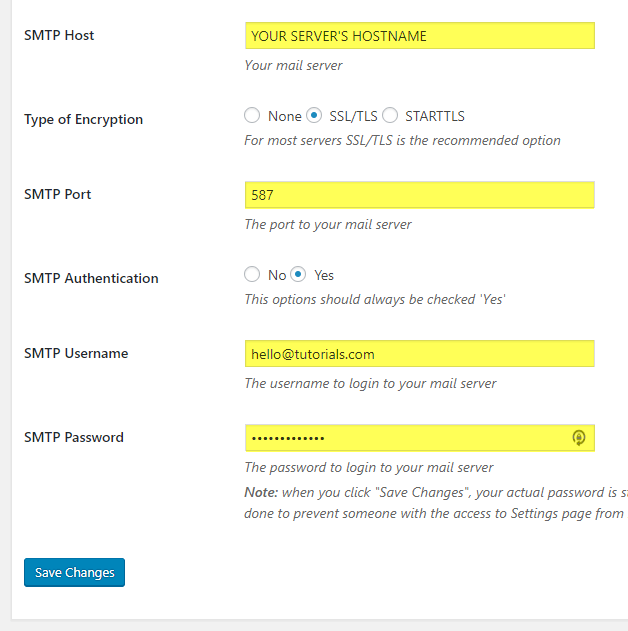
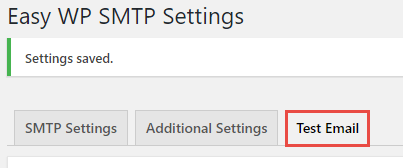
Click the Save Changes button to save the Easy WP SMTP settings. At the top of the page you’ll see a message “Settings were successfully saved”.

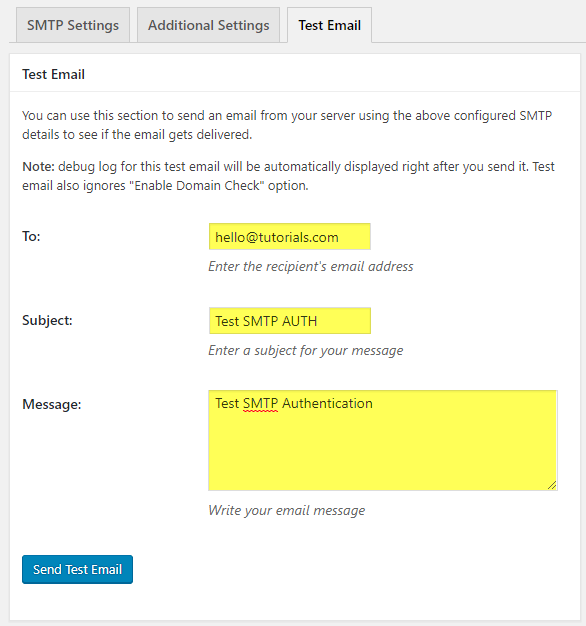
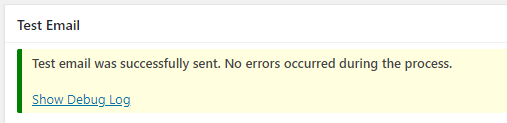
Now you’ll want to send a test email from your WordPress site to test and see if your SMTP Authentication is working properly. Click the Test Email tab. You can send the test email to any email address you’d like. After inputting an email address for the test email to be sent to click the Send Email button.
Now you can test your site notifications and contact forms to make sure email notifications from your WordPress site are sent and reach your inbox.
Setting up SMTP AUTH for your WordPress site is straightforward with the two plugin examples above. If you’re using either of those two plugins or another you’ve found in the WordPress marketplace and the test email isn’t working you’ll need to test using different ports.